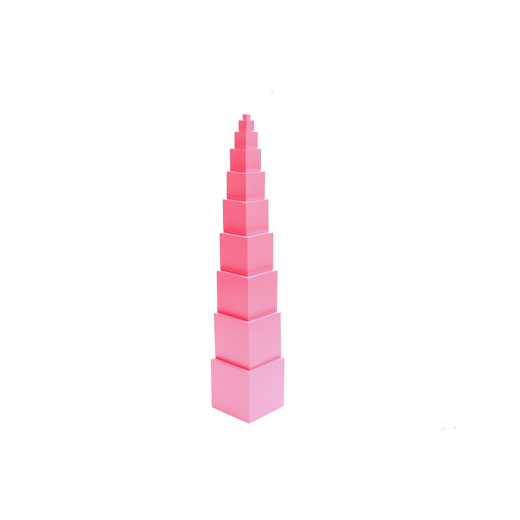
10 wooden cubes painted pink and width graduated in increments from 1 cm to 10 cm. (Stand sold separately)
Presentation
The Directress first shows the child how to carry the cubes to the floor mat:
For the first four cubes starting from the smallest, we use the first three fingers to grasp each cube over the top and place it randomly on the floor mat. From the 4th cube to the 7th cube, we may use one whole hand to bring each cube to the mat. As for the last three cubes, if its too big for the child to hold with one whole hand, then they may use both hands to carry it to the mat, by balancing the bottom of the cube with the palm of the other hand.
All the cubes are placed at random on the floor mat.
Directress then shows how to build a tower: Starts with the largest cube and place the next largest cube centrally on the previous one. Directress may show how to build the first three cubes and then, select the next largest cube and invites the child to place the cube on the previous one. Allow the child to do the last piece of cube by himself.
3 When the tower is completed, invite the child to view it from the top.
When the presentation is completed, Directress then shows how to remove the cubes, starting from the cube at the top and placing it on the mat. Directress shows for the first two cubes and then invites the child to remove the rest.
4 To place the cubes back to its shelves, we begin by taking the largest cube.
Points Of Interest
The child may choose to build the Pink tower.
The cubes have the advantage that any two successive cubes vary in three dimensions, length, with and height, thus making their difference in size reasonably obvious to children. Easy beginnings are never a waste of time when they help to establish basic ideas and here it may be useful to build a tower from:
The three or four smallest cubes.
The three largest cubes.
The three successive cubes from the middle.
With slow or special needs children, five cubes can be used,
made up with every other cube.The most difficult of the blocks to place in position is the smallest, which is 3/8" on each side. The child's arm has to be quite steady to place this small object in the center of the next largest block and requires close attention and obvious efforts in performing this task.
By holding the first few cubes with the thumb, index and middle fingers, i.e. the "pencil grip" will prepare the child for holding the pencil later when learning how to write.
After making repeated use of the cubes, a child's hand finally adopts automatically the precise position necessary to cover the top dimension of the cube.In other words, a child develops a muscular memory for define graduations of space.
Purpose
Develop the child's visual and muscular perception dimension in judging sizes.
Develop the child's coordination of movement and fine motor control.
Prepare the child, indirectly, for mathematics by giving the child experiences in comparison, grading and seriation with the cube.
Basic language- important in mathematics.
Variation
Instead of building it vertically up, we may build it horizontally, laying the cubes on the floor mat. Directress may show how to build the first 3 cubes and then allow the child to proceed with the rest of the cubes.
Play a game with the children. This can be done in a group. Select three different sized cubes and lay them on the table. Directress makes a request, for e.g. "Bring me the largest cube", "Bring me the smallest cube" or the Directress selects a cube and then says "Bring me a larger cube than this",...etc. The child will have to bring the cube required to the Directress.
May also be built as a spiral.
Invite the child to make a two dimensional representations of the tower. First, prepare some ready cut squares from pink paper or card, which matches the dimension of the cubes. Place these in a basket. Invite the child to first build the pink tower and then make a picture of the tower by gluing the squares onto a piece of paper.
Material Made by beech wood.


